Bivald of the Thorn is a legendary spirit affinity champion from the sacred order faction in Raid Shadow Legends. He is a superb champion to bring on Doom Tower runs and provides some impressive control to your teams. He can provide strong heals and deal good damage to opponents at the same time. In this guide information on how to build Bivald for the end game will be included. With further infromation on how to best use him in hydra and the doom tower, with team compositions and strategies included.
Bivald Stats Overview

- Faction: Sacred Order
- Type: Health
- Affinity: Spirit
- Rarity: Legendary
- HP: 22470
- Attack: 903
- Defense: 1178
- Critical Rate: 15
- Critical Damage: 50
- Speed: 98
- Resistance: 50
- Accuracy: 10
- Aura: Increase Ally HP in by 28.000000000000004
- Books to Max Skills: 11
Bivald Skills Overview

A1: Thorn Maul
Attacks 1 enemy. Has a 30% chance of placing a [Provoke] debuff for 1 turn. Also heals the ally with the lowest HP by 15% of the damage inflicted. The [Provoke] debuff can be placed even if this attack lands as a weak hit.
Upgrades as follows:
- Level 2: Damage +5%
- Level 3: Damage +5%
- Level 4: Buff/Debuff Chance +10%
- Level 5: Buff/Debuff Chance +10%

A2: Admonition of Barbs
Attacks all enemies 2 times. The first hit has a 75% chance of placing a [Provoke] debuff for 1 turn. The second hit has a 75% chance of placing a [Leech] debuff for 2 turns. Also places a 25% [Strengthen] buff on this Champion for 2 turns. The [Leech] and [Provoke] debuffs can be placed even if this attack lands as weak hits.
Upgrades as follows:
- Level 2: Damage +10%
- Level 3: Buff/Debuff Chance +10%
- Level 4: Buff/Debuff Chance +15%
- Level 5: Cooldown -1

A3: Briar Nexus
Attacks all enemies. Damage increases by 5% for each debuff on each enemy. Also heals all allies by 20% of the damage inflicted and places a [Shield] buff on them for 2 turns equal to 20% of the damage inflicted.
Upgrades as follows:
- Level 2: Damage +10%
- Level 3: Damage +10%
- Level 4: Cooldown -1
![Dethorned [P]](https://www.gamingelephant.com/wp-content/uploads/2024/01/Dethorned-P.png "Dethorned-P")
A4: Dethorned [P]
Decreases the damage taken by all allies from enemies under [Provoke] debuffs by 15%.
Upgrades as follows:
- No books needed.
Sigmund the Highshield End Game Build Guide
Bivald of the Thorn was a fusion champion in May 2022. He is a Sacred Order legendary and is one of the best PVE supports in the game if used correctly.
He is HP based meaning you can build him tanky with a decent damage output if you focus on this stat. With Provoke on 2 of his 3 skills his kit does extremely well on Hydra against the head of Decay that could otherwise cleanse the debuffs or place essentially a shield on the head with the least HP. Furthermore, Bivald cannot weak hit which is great against Poison cloud and weak affinity. His A1 can provoke with a 50% chance when fully booked while his A2 has a 100% chance fully booked and on a 3 turn cooldown.
Bivald can heals his allies in two skills as well. With his A1 he heals the ally with lowest HP based on the damage dealt and his A3 is also based on damage which is why it’s going to be important to build Bivald with 100% crit rate if you need to rely on him for healing and want to make the most of him. Along with the heal in his A3 he places shields based on 20% of the damage done. His A2 on top of the AOE provoke is going to place Leech on enemies and Strengthen buff on your entire team. His passive will reduce the damage taken by allies under Strengthen buff by 15%. All this is going to make him one of the best utility champions for hydra in the entire game no matter the difficulty.
Masteries
When selecting masteries focus on support tree to increase the shields and healing. In offense tree Warmaster is going to be a good T6 mastery for him specially for hydra since his healing and shields are based on damage dealt.

Gear & Stats Build
Stats are going to depend on the Hydra difficulty you would be facing. For NM the ideal stats are 400 ACC, 250+ speed. Since his heals and shields are going to be based on his damage and he is an HP champion, you are going to aim for 100% Crit Rate and as much HP as possible.
The best set for him is going to be Relentless to get his A2 back as soon as possible to keep Decay provoked (Note that Decrease Speed on Hydra helps with this). Reflex is a good option too. If you have some Decrease Accuracy champion in your team like Geomancer you can also build around 300 resist to prevent Mischief from stealing your buffs.
While those sets are recommended, they’re not required. Sets such as Immortal and Perception are great and can work well enough if you reach the required stats.
Recommended Main Stats
- Gloves: HP%/Crit Rate
- Chest: ACC/HP%
- Boots: Speed
- Ring: HP
- Amulet: HP with ACC substat
- Banner: ACC with speed substat

Hydra Team & Strategy
It is possible to 1 key NM hydra with Bivald. This team is composed of previous fusions, Lydia and 2 epics. The main idea is keep the head of Decay provoked with Bivald and since he can land provoke and Leech over poison cloud, we won’t have to worry too much about Blight.
- Ukko has block buffs and revive in case needed. He is going to be in the lead position with a Provoke set to get turn meter from Shamael converting debuffs.
- Lydia provides AOE Decrease DEF, Weaken, Increase Speed and Strengthen.
- Cybele is in a Guardian for some damage mitigation and brings AOE Decrease Speed as well as some useful buffs for survivability. She can be replaced with any AOE Dec Speed champion.
- Geomancer is going to do most of the damage thanks to his AOE A1 and special HP burn on A3. Note that for optimal results you might want to disable A2 on auto and force him to use A3 when it’s available.
- Bivald brings survivability with his shields, heals, lech and damage mitigation.
This team with the right stats and gear can auto some of the rotations when Bivald is the right affinity with torment.

Doom Tower with Bivald
Secret Room 10
Bivald can be great for controlling the waves making the Secret Rooms where he’s available extremely easy. One such example is the Secret Room 10 on Hard DT rotation. The idea behind this team is keep all enemies provoked as much as possible ideally on auto. The example team composition with roles include:
- Magnarr will do most of the damage but since Bivald is built with 100 crit rate he will bring some too on top of his heals and damage mitigation.
- Toragi in a Shield set along with ally protection will make the run super safe.
- Versulf for the second ally protection and safety.
- Husk will add some more crowd control with his AOE stun, A1 Provoke and some dps.

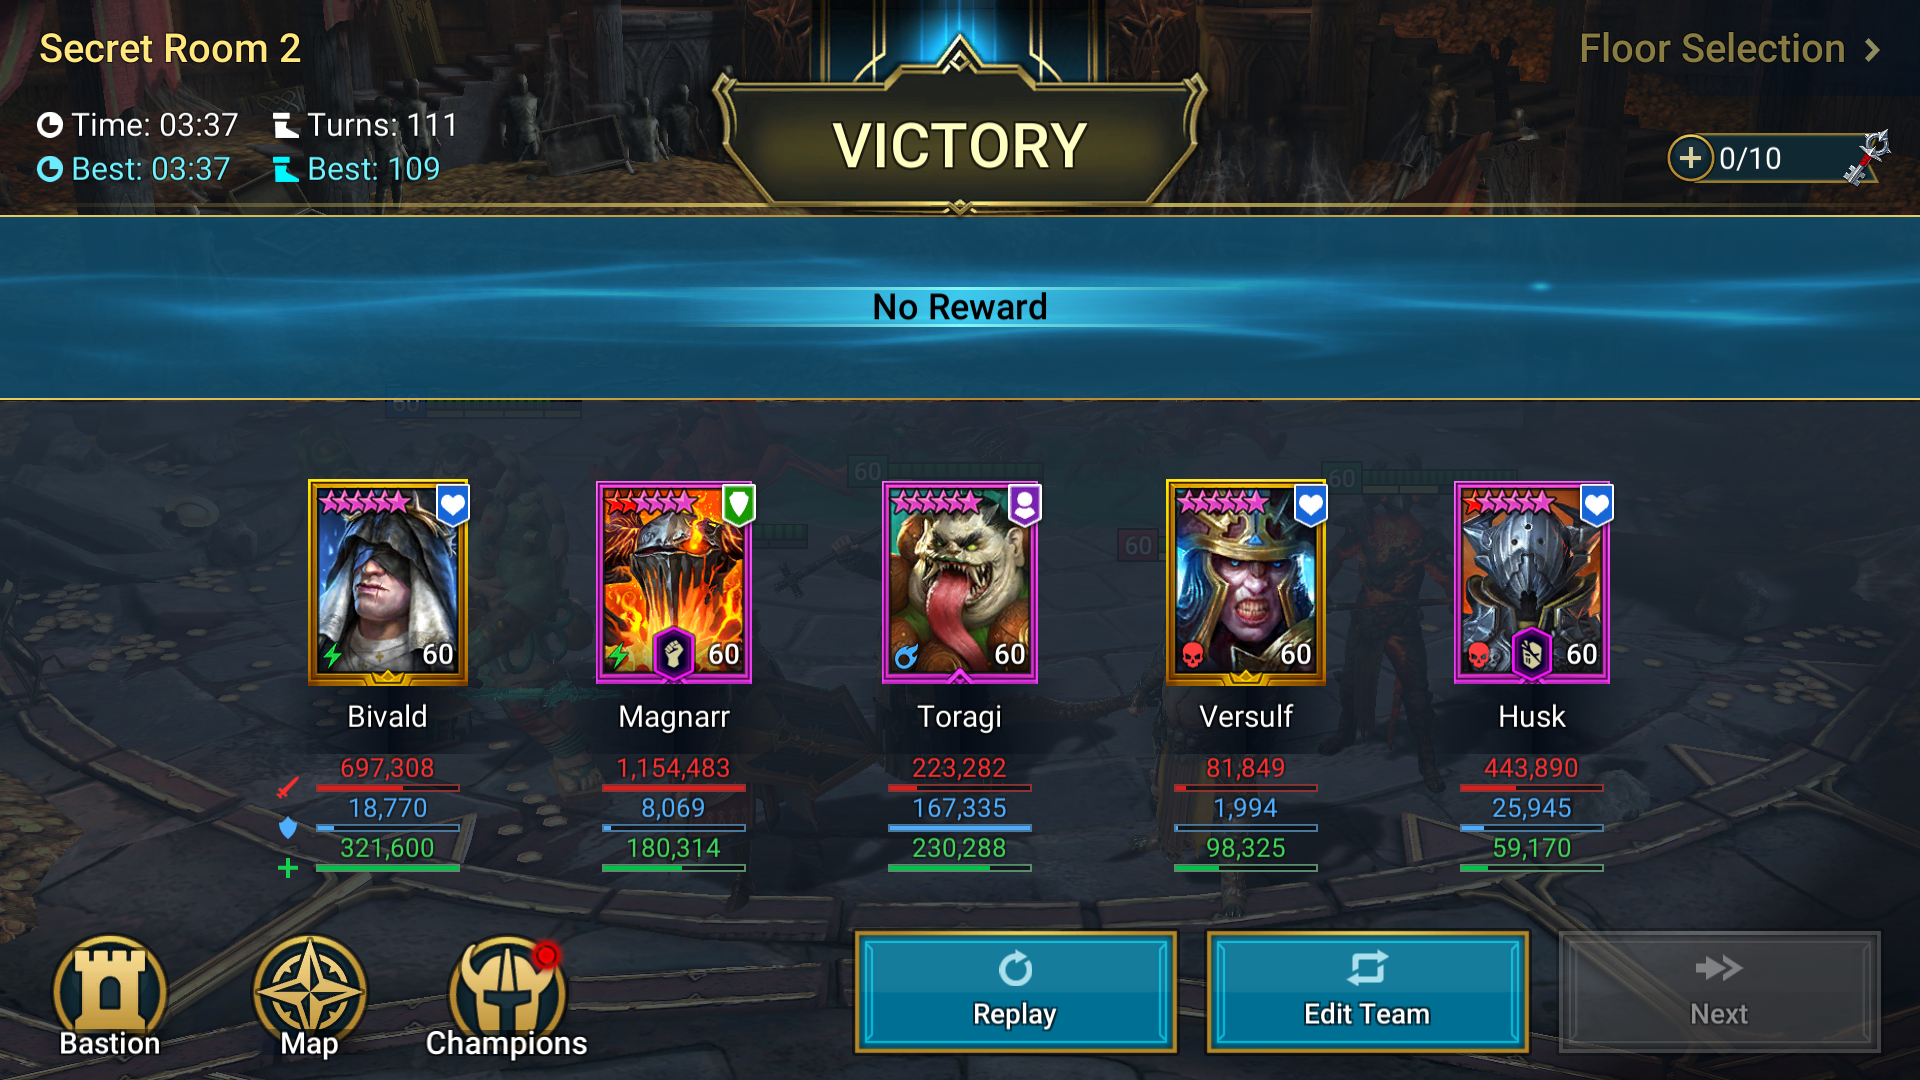
Secret Room 2
Another example is Secret Room 2 on Eternal Dragon Hard DT rotation. The idea behind this team is keep all enemies provoked as much as possible ideally on auto.
- Magnarr will do most of the damage but since Bivald is built with 100 crit rate he will bring some too on top of his heals and damage mitigation.
- Toragi in a Shield set along with ally protection will make the run super safe.
- Versulf for the second ally protection and safety.
- Husk will add some more crowd control with his AOE stun, A1 Provoke and some dps.
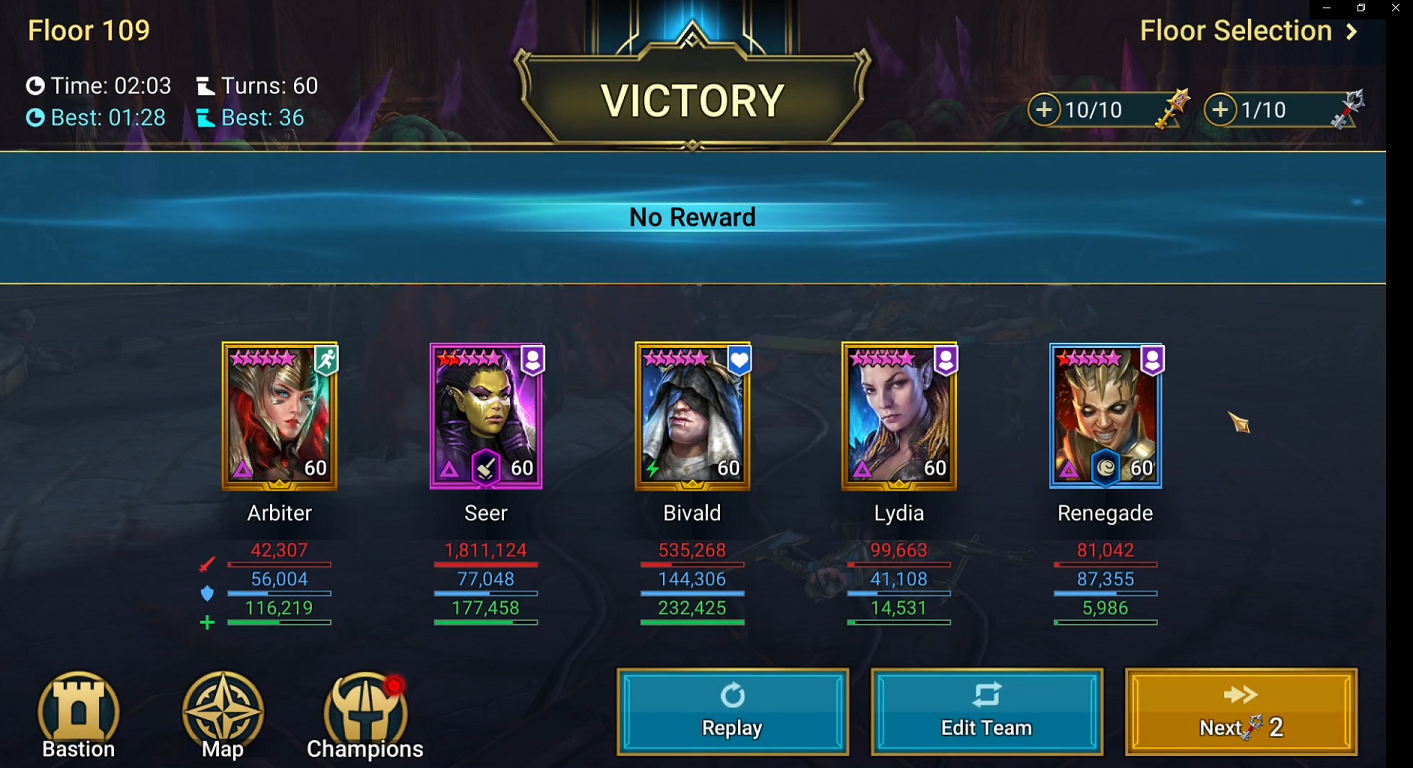
Floor 109
There are some problematic waves on hard Doom Tower where Bivald can help. Mortu in particular cannot have his Peril secret skill blocked by conventional means including block passive skills. Permanenly keeping Mortu provoked is a good alternative and the following team has managed it:
- Arbiter for TM boost, revive and buffs.
- Seer for wave clearing.
- Bivald for Provoke and healing.
- Lydia for AOE Decrease DEF, Weaken and buffs.
- Renegade for skill reset.